
Installation Instructions
Straight Pin with Mounting Tool
5.2
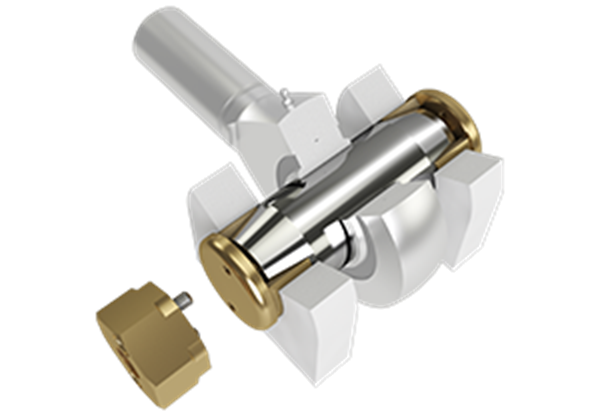
Following these instructions will ensure that the Expander System is installed correctly and the pivot life is prolonged.
Congratulations! You have purchased a custom engineered solution to the pivot wear problem on your machine. Contact your dealer or Expander before proceeding if you have any questions.
Expander System pivot pin comes with a warranty against lug wear of 10 years / 10 000 hours in operation (whichever comes first) from the date of purchase.
The picture shows a female axle but the principle is the same for other designs.

1 Bolt. 2 Washer. 3 Sleeve. 4 Axle (Pin). 5 Bolt for mounting tool. 6 Stop screws. 7 Mounting tool 8 Allen key screws.
Preparation
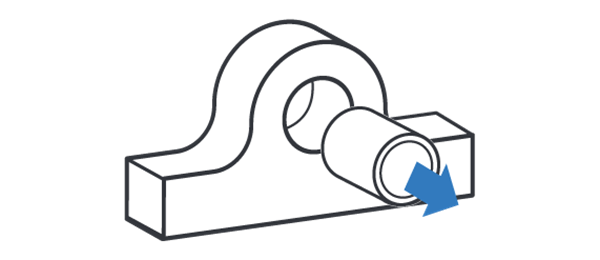
Odstraňte případné průchodky. Zabráníte tak budoucímu opotřebení mezí průchodkou a nosným okem.
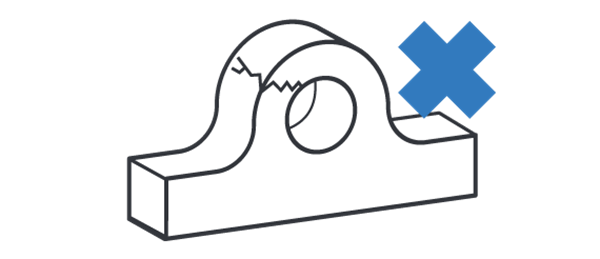
Před instalací opravte jakákoli případná strukturální poškození tzn. například trhliny či ohnutá nosná oka.
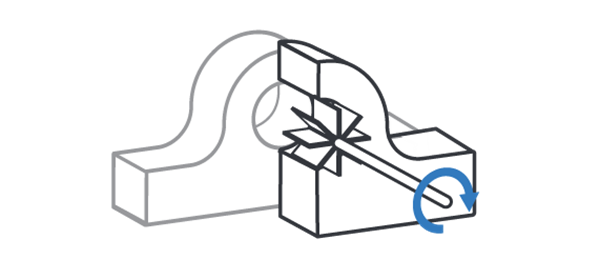
Zarovnejte nepravidelnosti povrchů vývrtu.
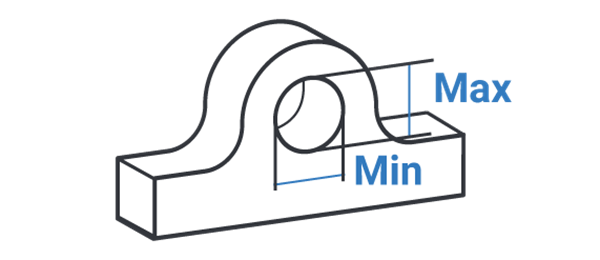
Rozdíl mezi minimálním a maximálním průměrem v opotřebeném otvoru nosného oka nesmí překročit 1,5 mm (0,06”). V opačném případě by pouzdro nesedělo správně.
ATTENTION! If the worn lugs diameter at any point is 2 mm (.080”) or more over original lug diameter contact your dealer or Expander System. You will need oversized sleeves.
Installation
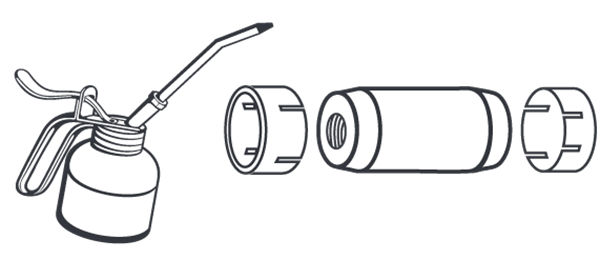
Promažte pouzdra a osu dostupným mazivem – pokud možno grafitovým. NEAPLIKUJTE MAZIVO NA ZÁVITY!
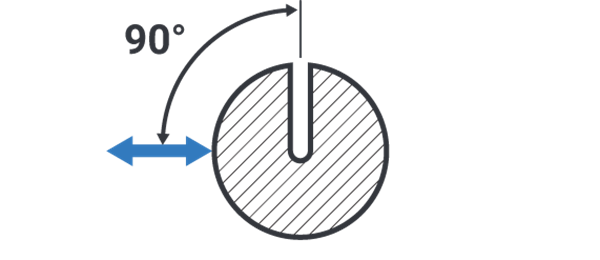
UPOZORNĚNÍ! Pokud relevantní: umístěte mazací výstup do úhlu 90 stupňů vůči směru působení síly tak, aby byla minimalizována koncentrace napětí na výstupu.
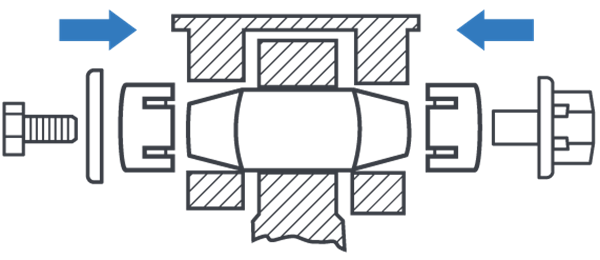
Assemble the mounting tool and bolt for mounting tool using the allen key screws. Insert the axle and position it in the bores. Install the sleeves, then the washers and fasteners. Tighten the fasteners with recommended torque.
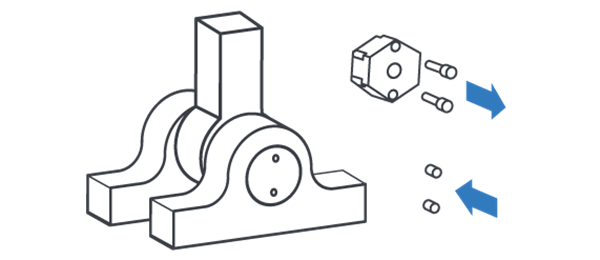
Remove the allen key screws and mounting tool. Mount the stop screws.
Torque recommendations
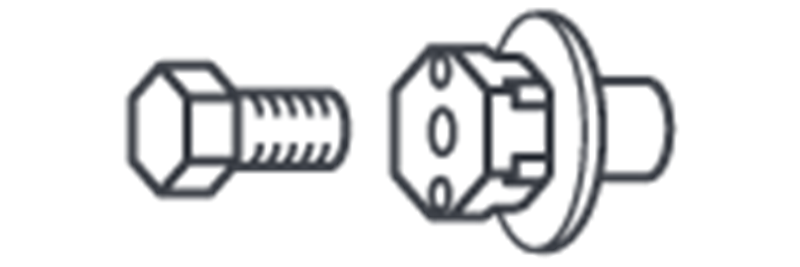
Hex Bolts and Bolts for Mounting Tool
Torques M12-M24 ± 10%, M30... +30/-0%
| M12 | M14 | M16 | M20 | M24 | M30 | M36 | M42 | |
| Nm | 70 | 115 | 175 | 350 | 500 | 600 | 700 | 900 |
| lb-ft | 52 | 85 | 129 | 258 | 369 | 443 | 516 | 664 |

Šestihranné matice: Standardní výška
Momenty M12-M24 ± 10%, M30... +30/-0%
| M12 | M14 | M16 | M20 | M24 | M30 | M36 | M42 | |
| Nm | 65 | 115 | 175 | 250 | 350 | 500 | 600 | 700 |
| lb-ft | 48 | 85 | 129 | 184 | 258 | 369 | 443 | 516 |

Šestihranné matice: Snížená výška
Veškeré utahovací momenty ± 10%
| M12 | - | M16 | M20 | M24 | M30 | - | - | |
| Nm | 60 | - | 125 | 200 | 275 | 350 | - | - |
| lb-ft | 44 | - | 92 | 148 | 203 | 258 | - | - |

Kruhové matice se zářezy
Veškeré utahovací momenty ± 10%
| M17 | M25 | M35 | M45 | M55 | M65 | M75 | M85 | |
| Nm | 50 | 120 | 250 | 500 | 600 | 700 | 800 | 900 |
| lb-ft | 37 | 89 | 184 | 369 | 443 | 516 | 590 | 664 |
Final Check

Po počátečním utažení nechte strojní zařízení vykonat několikrát plnou škálu možných pohybů a překontrolujte utahovací momenty. Utažení (utahovací moment) dále kontrolujte po 10 hodinách, 40 hodinách a poté v pravidelných servisních intervalech, aby bylo zajištěno udržení správného usazení rozpěrných pouzder.

Ensure that there is a minimum distance of 0,5mm (0.02”) between the washer and the lug. Ensure that there is a minimum distance of 0,5mm (0.02”) between the bolt for the mounting tool and the lug. ATTENTION! If the washer or bolt for the mounting tool is in contact with the lug, contact your dealer or Expander System.
Dismounting

Systém Expander demontujete tak, že odšroubujete spojovací prvky na obou stranách a odstraníte podložky.

Poté klepejte na osu, dokud nedojde k uvolnění mechanického napětí na pouzdru. Vyjměte pouzdro a stejným způsobem postupujte i na druhé straně. VYVARUJTE SE POŠKOZENÍ ZÁVITŮ!
