
Installation Instructions
Straight Pin, Multibolt
5.4

Following these instructions will ensure that the Expander System is installed correctly and the pivot life is prolonged.
Congratulations! You have purchased a custom engineered solution to the pivot wear problem on your machine. Contact your dealer or Expander before proceeding if you have any questions.
Expander System pivot pin comes with a warranty against lug wear of 10 years / 10 000 hours in operation (whichever comes first) from the date of purchase.

A. Female axle. 1 Bolt. 2 Washer. 3 Sleeve. 4 Axle (Pin).
Preparation
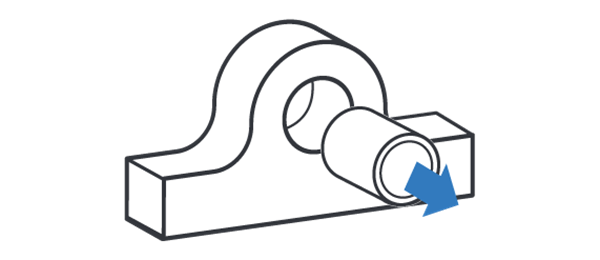
Remover qualquer bucha para eliminar desgaste futuro entre bucha e olhal de montagem.
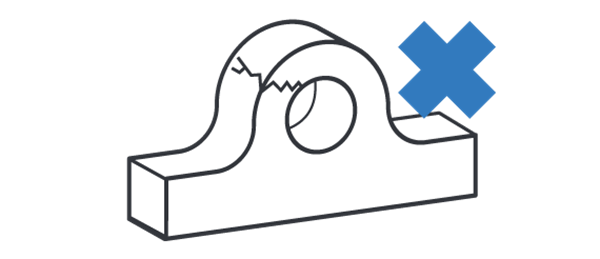
Reparar qualquer estrutura danificada ex. Trincas ou olhais tortos.
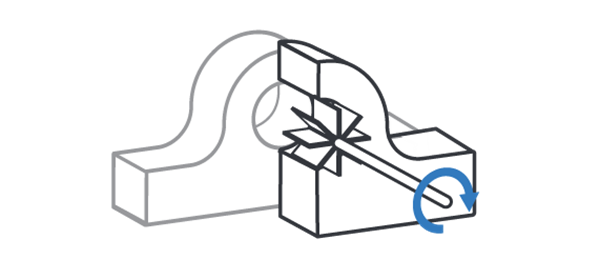
Suavize irregularidades na superfície dos furos dos olhais.
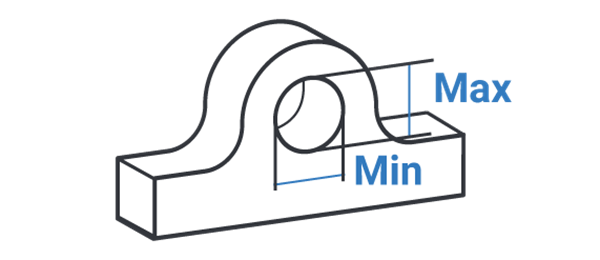
A diferença entre diâmetro min. e max. no desgaste do olhal deve ser dentro de .06” (1.5 mm) para o correto encaixe das luvas.
ATTENTION! If the worn lugs diameter at any point is 2 mm (.080”) or more over original lug diameter contact your dealer or Expander System. You will need oversized sleeves.
Installation
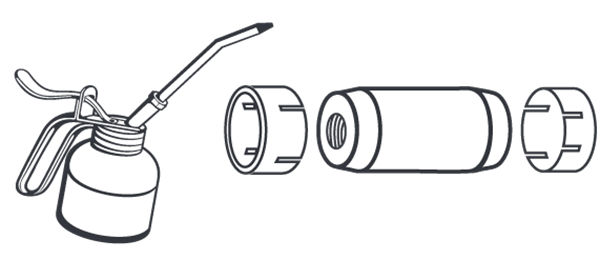
Engraxe as luvas e eixo com a graxa disponível, de preferência graxa grafitada. NÃO ENGRAXE AS ROSCAS.
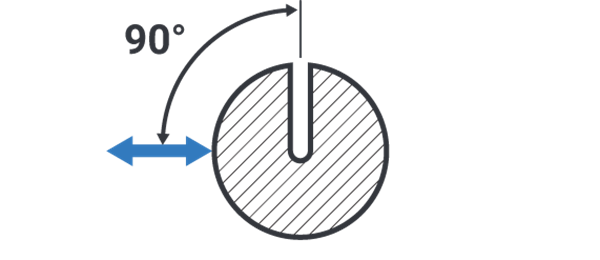
NOTA! Se aplicável: posicione a saída de graxa a 90 graus para forçar a direção para minimizar a concentração de estresse na saída.

Insira o pino e o posicione nos furos. Instale as luvas, em seguida as arruelas de tensão e espaçadores. Aperte os espaçadores com o torque específico da tabela ao lado.
Torque recommendations

Parafusos hexagonais
Torques M12-M24 ± 10%, M30... +30/-0%
| M12 | M14 | M16 | M20 | M24 | M30 | M36 | M42 | |
| Nm | 70 | 115 | 175 | 350 | 500 | 600 | 700 | 900 |
| lb-ft | 52 | 85 | 129 | 258 | 369 | 443 | 516 | 664 |
Final Check

Após o torque inicial movimente a máquina em sua amplitude total várias vezes e reconfirme o torque. Verifique o torque após 10 horas, 40 horas e em intervalos regulares de serviço para assegurar o correto assentamento das luvas.

Verifique se existe uma distância de no mínimo 0.5 mm entre a arruela e o olhal. ATENÇÃO! Se a arruela estiver em contato com o olhal, contate seu revendedor do Sistema Expander.
Dismounting

Bata no eixo alternativamente do lado esquerdo e direito até a tensão nas luvas for aliviada. Remova as luvas e eixo. NÃO DANIFIQUE AS ROSCAS.

Para desmontar o Sistema Expander, desaparafuse os espaçadores em ambas as extremidades e remova as arruelas.
